Bulk Operations
01/08/2025
After logging in to PoolParty and selecting your project, you see the concept schemes represented as a tree on the left hand side. To use the multiselection feature, you need to activate it. Select one concept from the left-hand tree-view as the first concept in your multiselection:
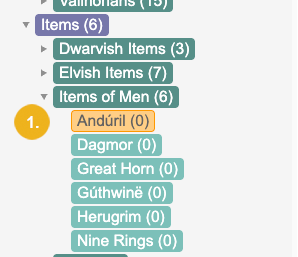
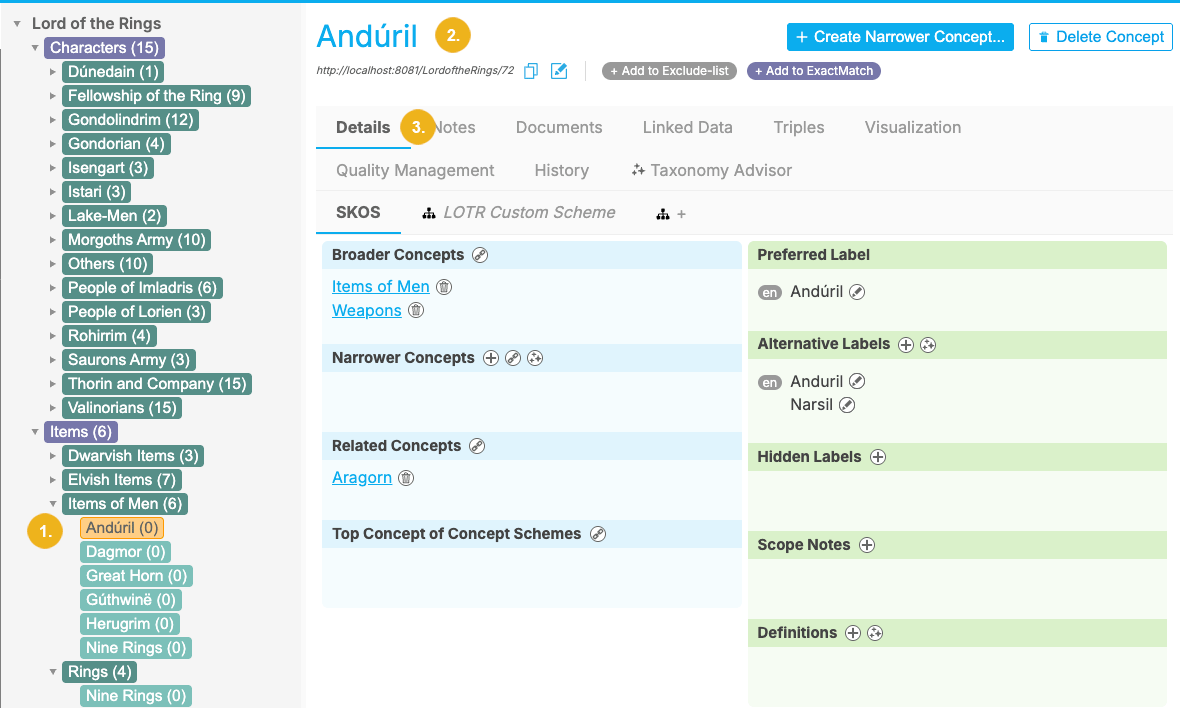
The selected concept (1) will display with a dark orange highlight and its details (2) will appear in the right panel (3).
Activate multiselection by holding Ctrl while clicking on additional concepts, or by right-clicking the selected concept and choosing Start Multiselection. Once activated, checkboxes appear next to selectable concepts.
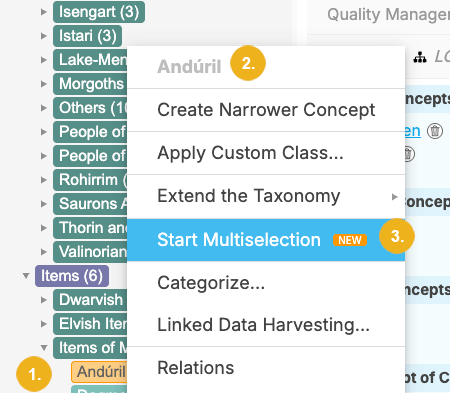
The context menu for our selected concept indicated by dark orange highlight (1) shows this concept grayed out (2) on the top, and the Start Multiselection (3) item which you click to start the multiselection.
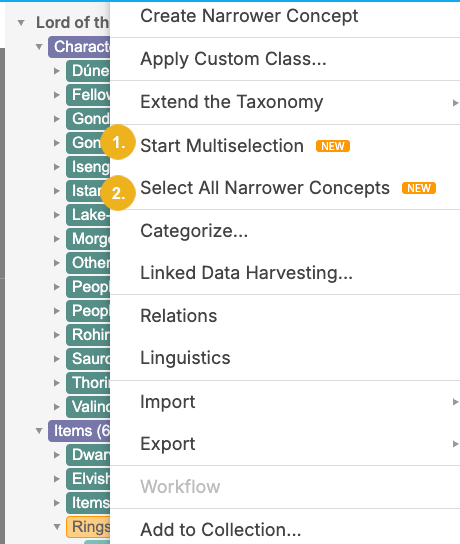
If you, however, select a top concept you will have the option to either Start Multitselection (1) or Select All Narrower Concepts (2) under the selected top concept.
Once activated, checkboxes appear next to selectable concepts. The checkbox for the initially selected concept is automatically ticked. Check additional checkboxes to add other selectable concepts to your selection. The number of selected concepts appears on the right at the top of the tree view. Additionally, there is a trailing button (X) next to the total number of selected concepts to clear all selections.
You can individually tick or untick checkboxes or click them holding the Shift key to select or deselect a range of selectable concepts.
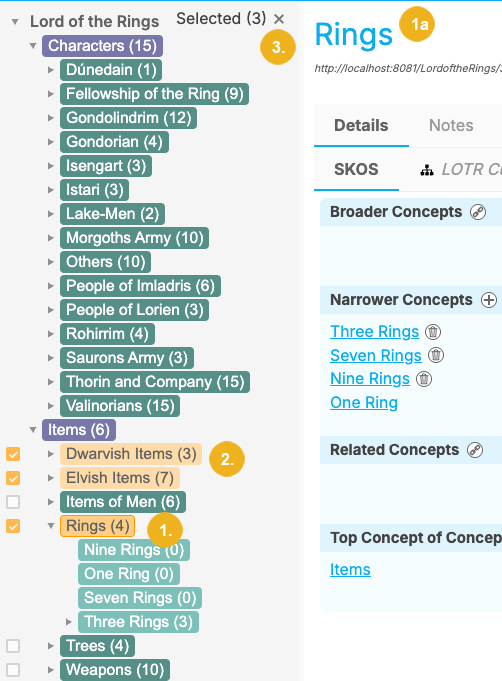
The image shows the originally selected concept with dark orange highlight (1), other selected concepts with light orange highlight (2), unticked checkboxes for selectable concepts, the total number of Selected (3) concepts (3) at the top of the tree view, and on the right panel the Details view of the originally selected first concept (1a).
Tip
With multiselection you can select any combination of concept schemes, top concepts, and concepts, regardless of whether they share the same parent node.
With multiselection, you can perform these bulk operations:
apply and remove a custom class across multiple concepts
add multiple concepts to collections in one action
delete multiple concepts simultaneously
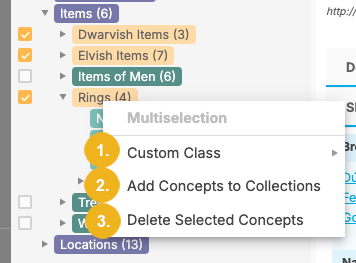
The image above shows the selected concepts highlighted in orange, and the context menu accessible via right-click. This menu shows three operations: Custom Class (1), Add Concepts to Collections (2) and Delete Selected Concepts (3).
Provided that custom classes have been defined for your PoolParty project you can apply these to both individual and multiple concepts. The same is true regarding removal of any previously assigned custom class both across multiple and individual concepts.
Tip
Custom class reasoning allows you to manage class inheritance based on an In Scheme relation. This means you can define custom classes and control their application to concepts within a concept scheme, subtree, or collection, based on whether the In Scheme relation exists for that concept. For more details on custom ontologies and classes refer to the section How to Use Custom Ontologies and Custom Schemes in PoolParty.
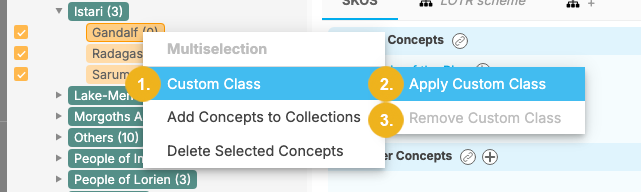
Right-click a selected concept to open the context menu. Hover over Custom Class (1) to reveal two options: Apply Custom Class (2) and Remove Custom Class (3)
Note
If a custom class has already been assigned to one or multiple concepts, the Apply Custom Class (2) menu item will be grayed out and you will not be able to assign any custom class to such; at the same time the Remove Custom Class (3) menu item will be active allowing you to remove any previously assigned custom class. If no class has been applied, then the Remove Custom Class (3) is grayed out.
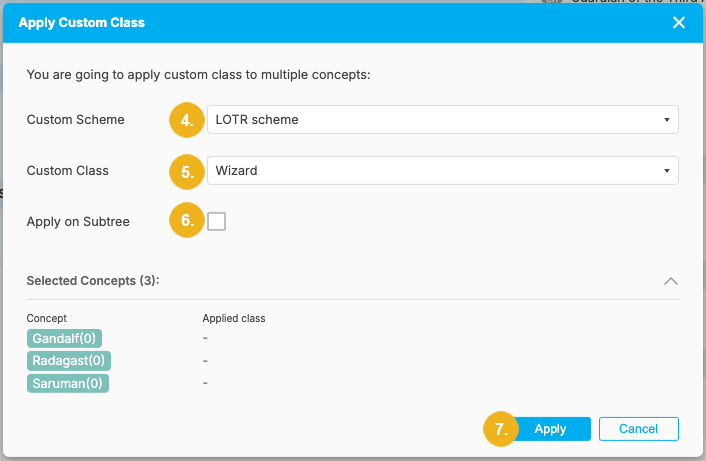
If the selected concepts do not already have a custom class applied to them, you can click Apply Custom Class (2). This will open the Apply Custom Class dialog. Select a custom scheme (4) as well as the associated custom class (5) to be applied to the selected concepts. You can also apply the custom class to all members of the selected concepts' subtrees (6). Finally, click Apply (7) to confirm .
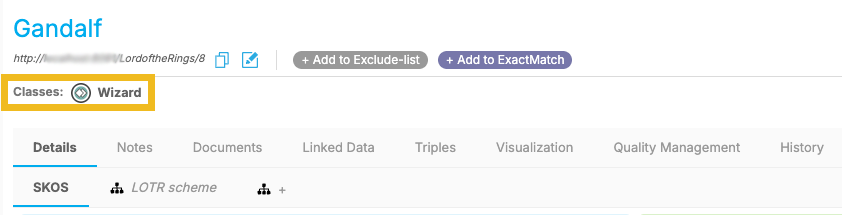
Once the custom class has been applied, it will appear beneath the URI of each concept.
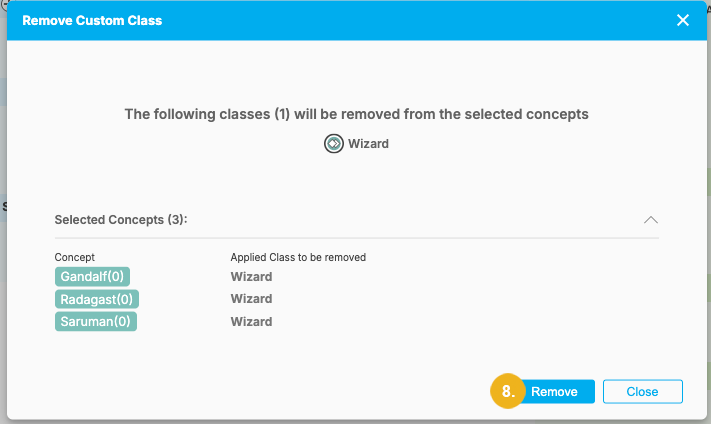
Click on Remove Custom Class (3) to open a dialog displaying which custom class will be removed for the selected concepts. Click Remove (8) to confirm.
Note
This dialog shows how many and which classes which will be removed both overall and specifically for each selected concept.
Note
Only concepts and top concepts can be added to collections. If a concept scheme is selected together with other concepts, the Add Concepts to Collections menu item will be greyed out. To add selected concepts to a collection, you first need to deselect any selected concept schemes.
Right-click a selected concept to open the context menu. With multiple concepts selected, choose Add Concepts to Collections to open this dialog (1):
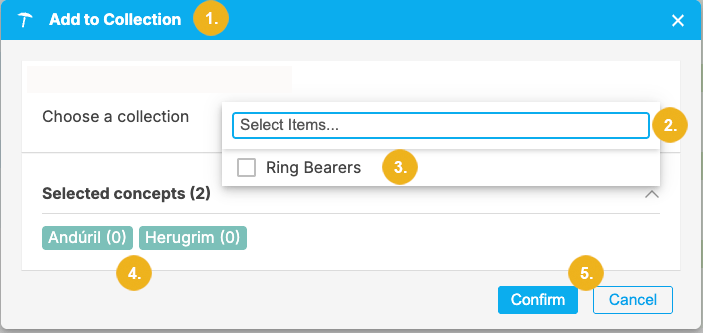
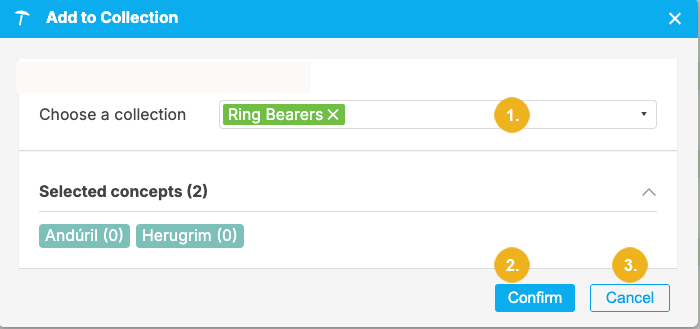
In the dialog click the input field (2) to select an existing collection (3). You can specify multiple collections if these are configured. Verify the list of concepts to be added(4) and click Confirm (5) to add the concepts or Cancel (5) to abort. After selecting the collection this window will appear as follows:
If no collections are set for your project you will not be able to add selected concepts to a collection. In this case, cancel the operation, create a collection and then add the selected concepts to it.
Verify whether these concepts were added to the selected collection and view the selected collection which in our example looks like this:
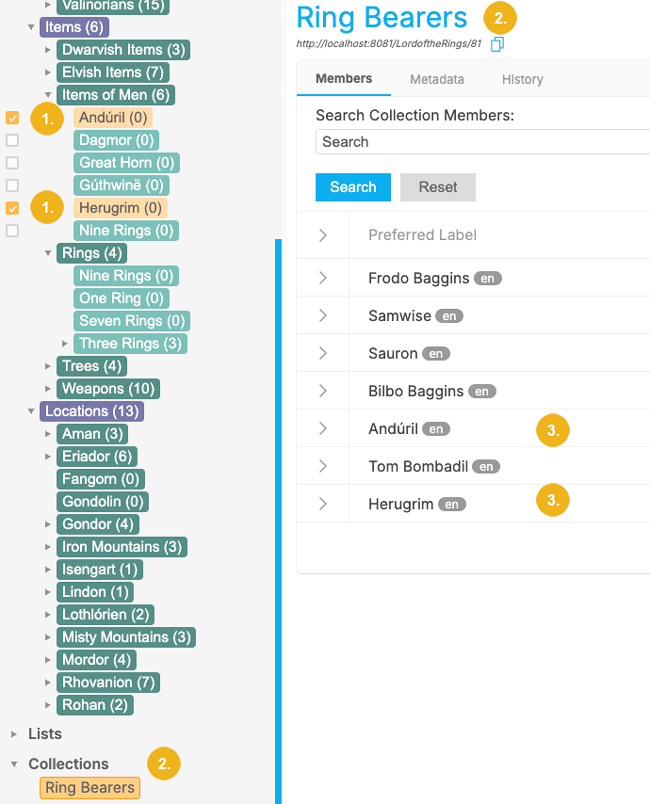
You see the selected concepts (1) with an orange highlight on the left. Below, you see the collection we used in our example (2) also highlighted in orange. The right hand side shows the actual collection (2) and the two added concepts (3).
Right-click a selected concept to open the context menu. Choose Delete Selected Concepts from the context menu. A dialog (1) opens prompting to confirm the deletion.
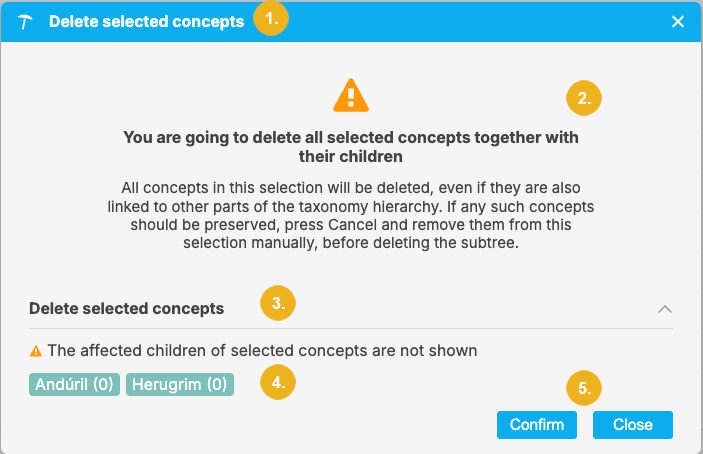
Carefully review the information shown on the confirmation dialog. Bear in mind that all selected concepts (4) AND their children (2) will be permanently deleted. Verify the list of concepts to be deleted. Click Confirm (5) to proceed or Close (5) to cancel .